One of the most exciting projects you can tackle in image editing software that supports layering—Adobe Photoshop, Photoshop Elements, Pixelmator, etc.—is to combine images in interesting ways. Whether you’re crafting a surreal piece of art or swapping heads, the process is similar in each program. In this column, you’ll learn how to use Photoshop Elements to combine a photo of an Italian villa and a glass of red wine in order to create a version of Italy you can drink.
Combine the images into a single document, rotate and resize
- Fire up the Elements Editor and click the Expert button at the top of the workspace.
- Choose File > Open and locate the image you want to base the composite on, such as the wine glass shown here.
- Summon the Layers panel by clicking the Layers button at the bottom of the workspace.
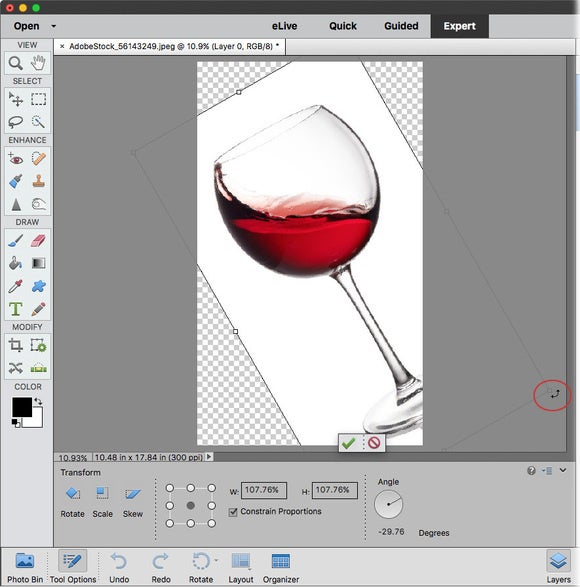
- If the image needs rotating, choose Image > Transform > Free Transform. Point your cursor near one of the corner handles and when it turns into a curved arrow (circled), drag to rotate the image to your liking.
To reposition the image, click and drag inside the box. When you’re finished, click the green checkmark beneath the image to accept the transformation (or press the Return key on your keyboard).

- Add another image to the document by choosing File > Place. Navigate to where the other image lives on your hard drive and click Place.
- When the image opens, Elements surrounds it with resizing handles. If you need to resize it, peek in the Tool Options panel and make sure Constrain Proportions is turned on, and then drag any corner handle to resize the image. Drag within the box to reposition the image if necessary. Click the green checkmark beneath the image when you’re done.
Mask and adjust color
To hide a portion of an image you can use a layer mask. In this example, we’ll hide the sky in the villa image. Sometimes it’s easier to select what you don’t want and then invert the selection in order to select what you do want.
To read this article in full or to leave a comment, please click here


